Keycloak (Authenticator only)
This guide describes the configuration of the Keycloak implementation of Apache Causeway' Authenticator API.
It does not however provide any implementation of Authorizor SPI. You will therefore need to configure an alternative implementation, eg the Bypass implementation (to disable authorisation checks completely), or use the SecMan implementation (see here for details).
Dependency
In the webapp module of your application, add the following dependency:
<dependencies>
    <dependency>
        <groupId>org.apache.causeway.security</groupId>
        <artifactId>causeway-security-keycloak</artifactId>
    </dependency>
</dependencies>
Update AppManifest
In your application’s AppManifest (top-level Spring @Configuration used to bootstrap the app), import the CausewayModuleSecurityKeycloak module and remove any other CausewayModuleSecurityXxx modules.
@Configuration
@Import({
        ...
        CausewayModuleSecurityKeycloak.class,
        ...
})
public class AppManifest {
}
Also, as this module provides no implementation of the Authorizor SPI, instead you will need some an alternative implementation, such as the Bypass implementation. (Note: this will in effect disable authorisation checks).
@Configuration
@Import({
        ...
        CausewayModuleSecurityKeycloak.class,   (1)
        AuthorizorBypass.class,             (2)
        ...
})
public class AppManifest {
}| 1 | make sure that no other CausewayModuleSecurityXxx module is imported. |
| 2 | or some other implementation of Authorizor. |
Walk-through
For simplicity, we’ll run Keycloak in Docker with an in-memory database. Obviously in production you would need a persistent database.
| These notes were adapted from the tutorial provided on keycloak’s website. |
Startup keycloak and login as keycloak admin
-
Start up keycloak; we’ll run on port 9090:
docker run -p 9090:8080 \ -e KEYCLOAK_USER=admin \ -e KEYCLOAK_PASSWORD=admin \ quay.io/keycloak/keycloak:14.0.0 -
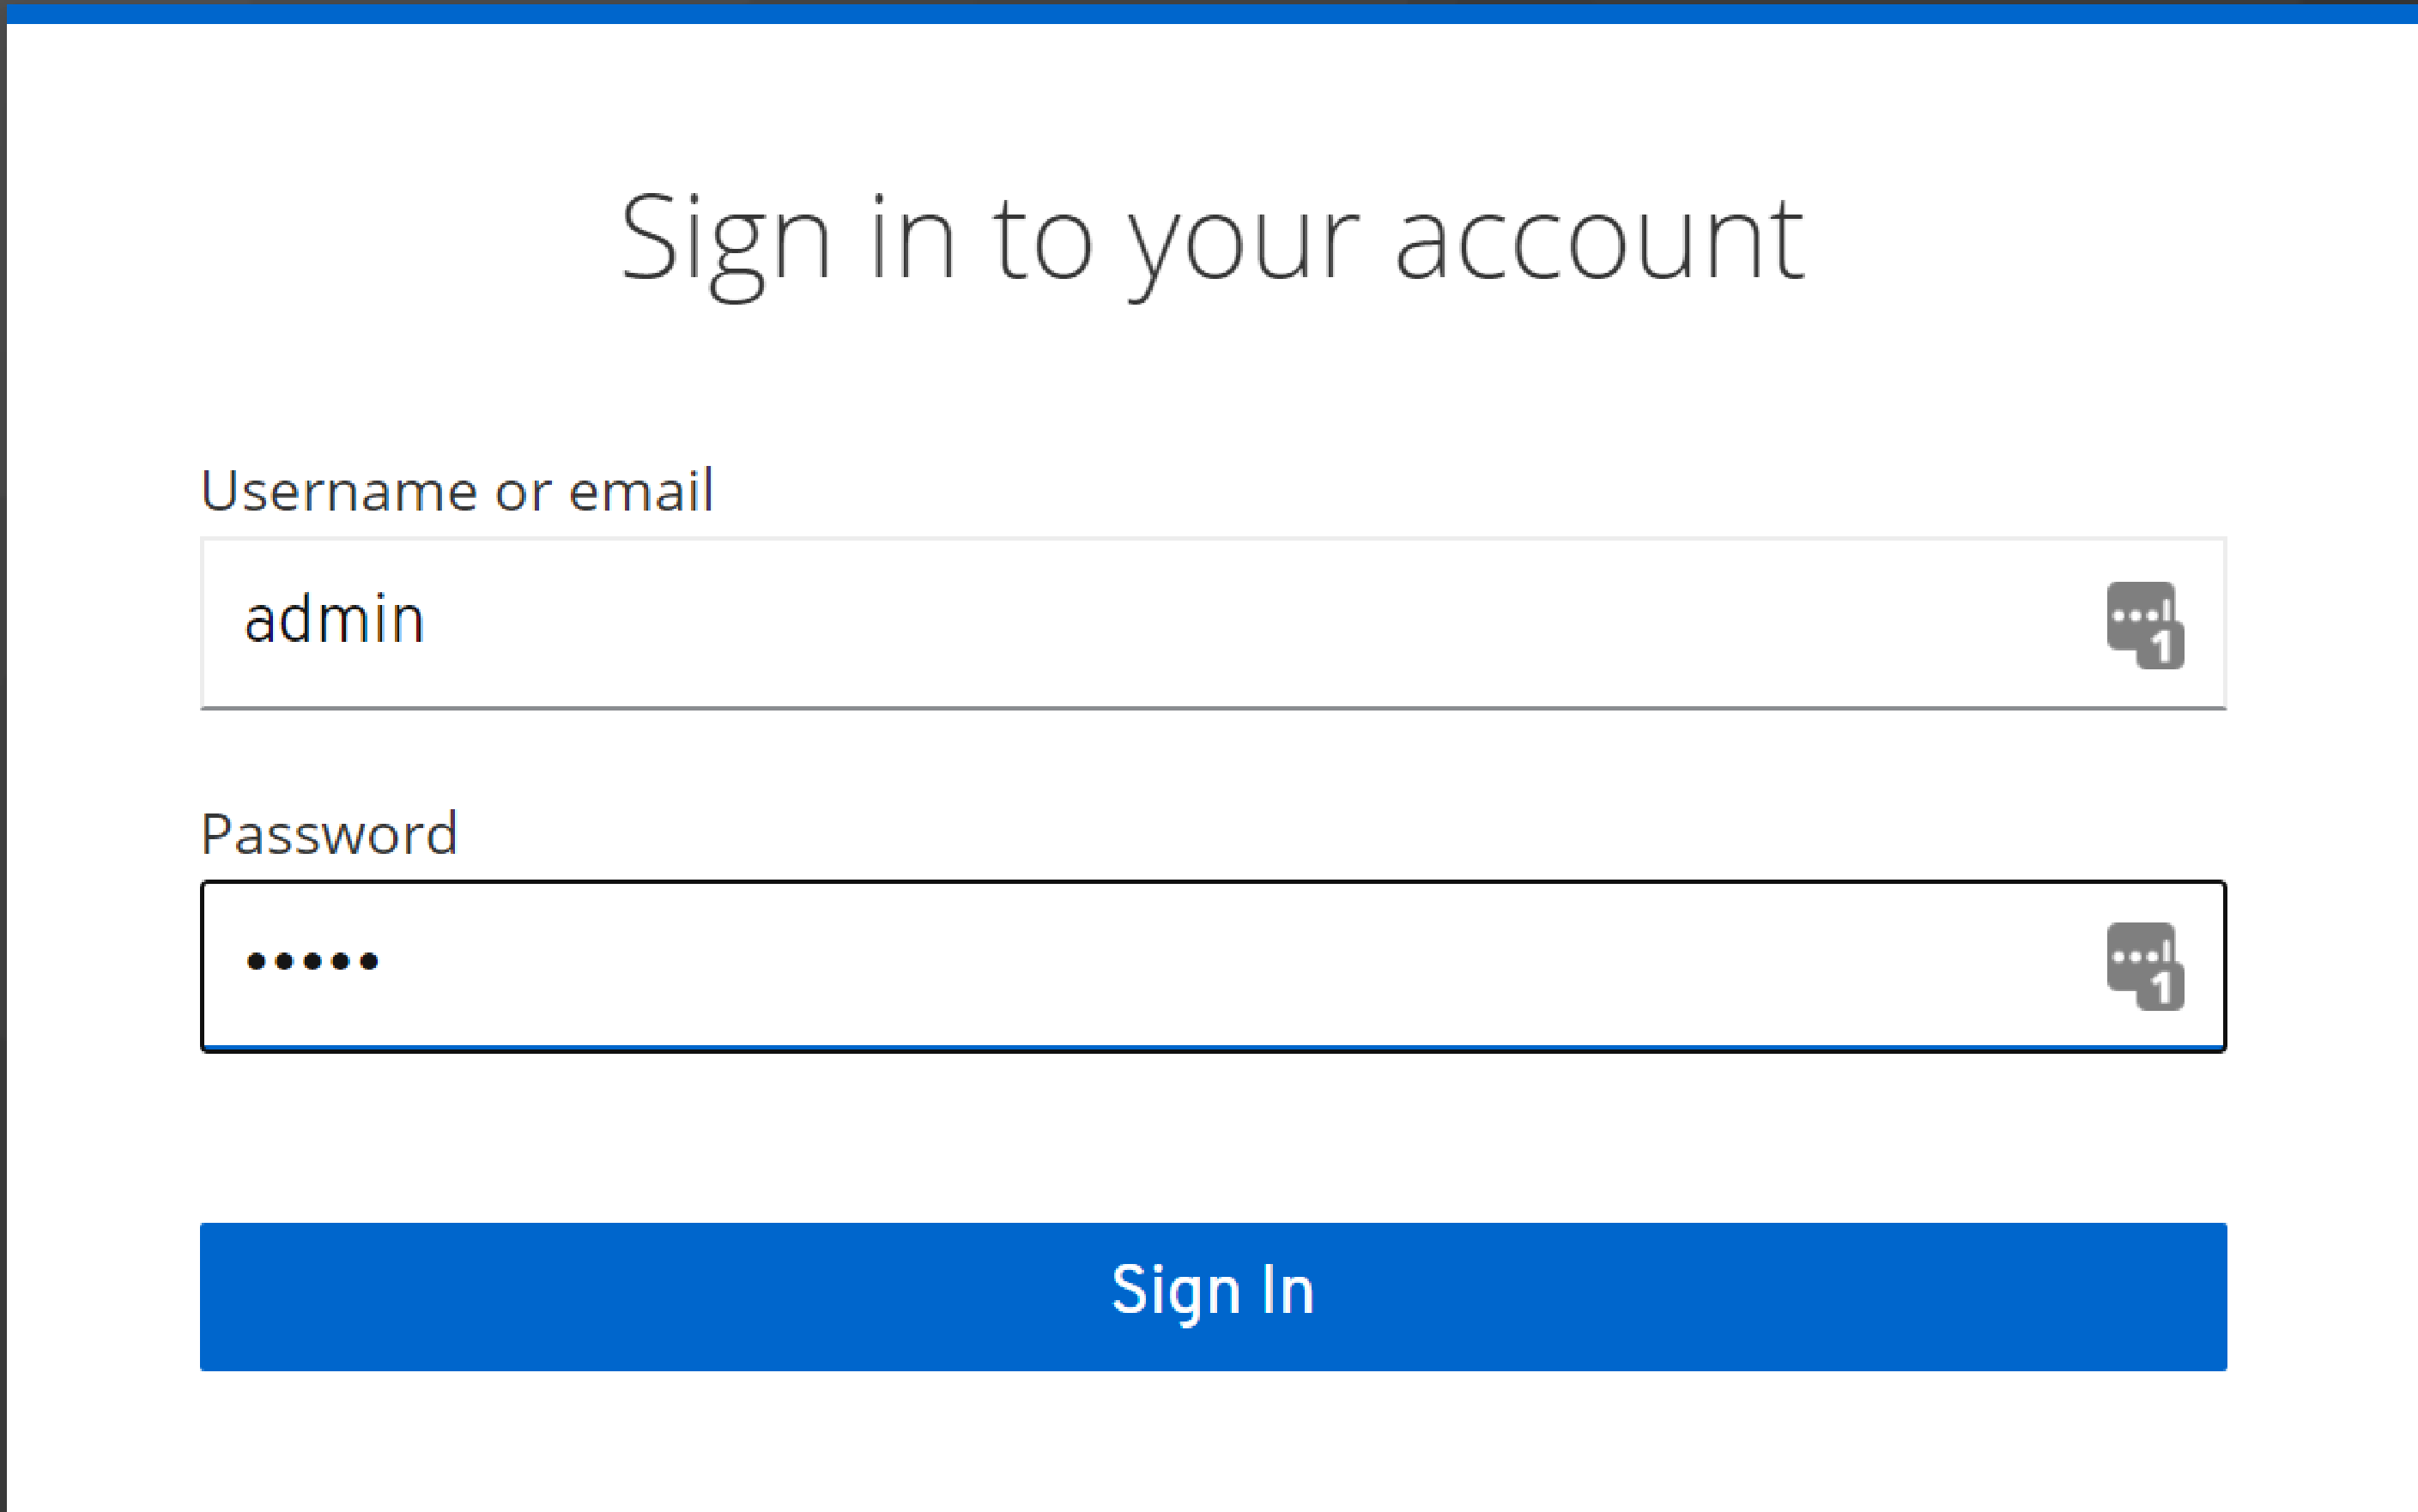
login to the Admin console:
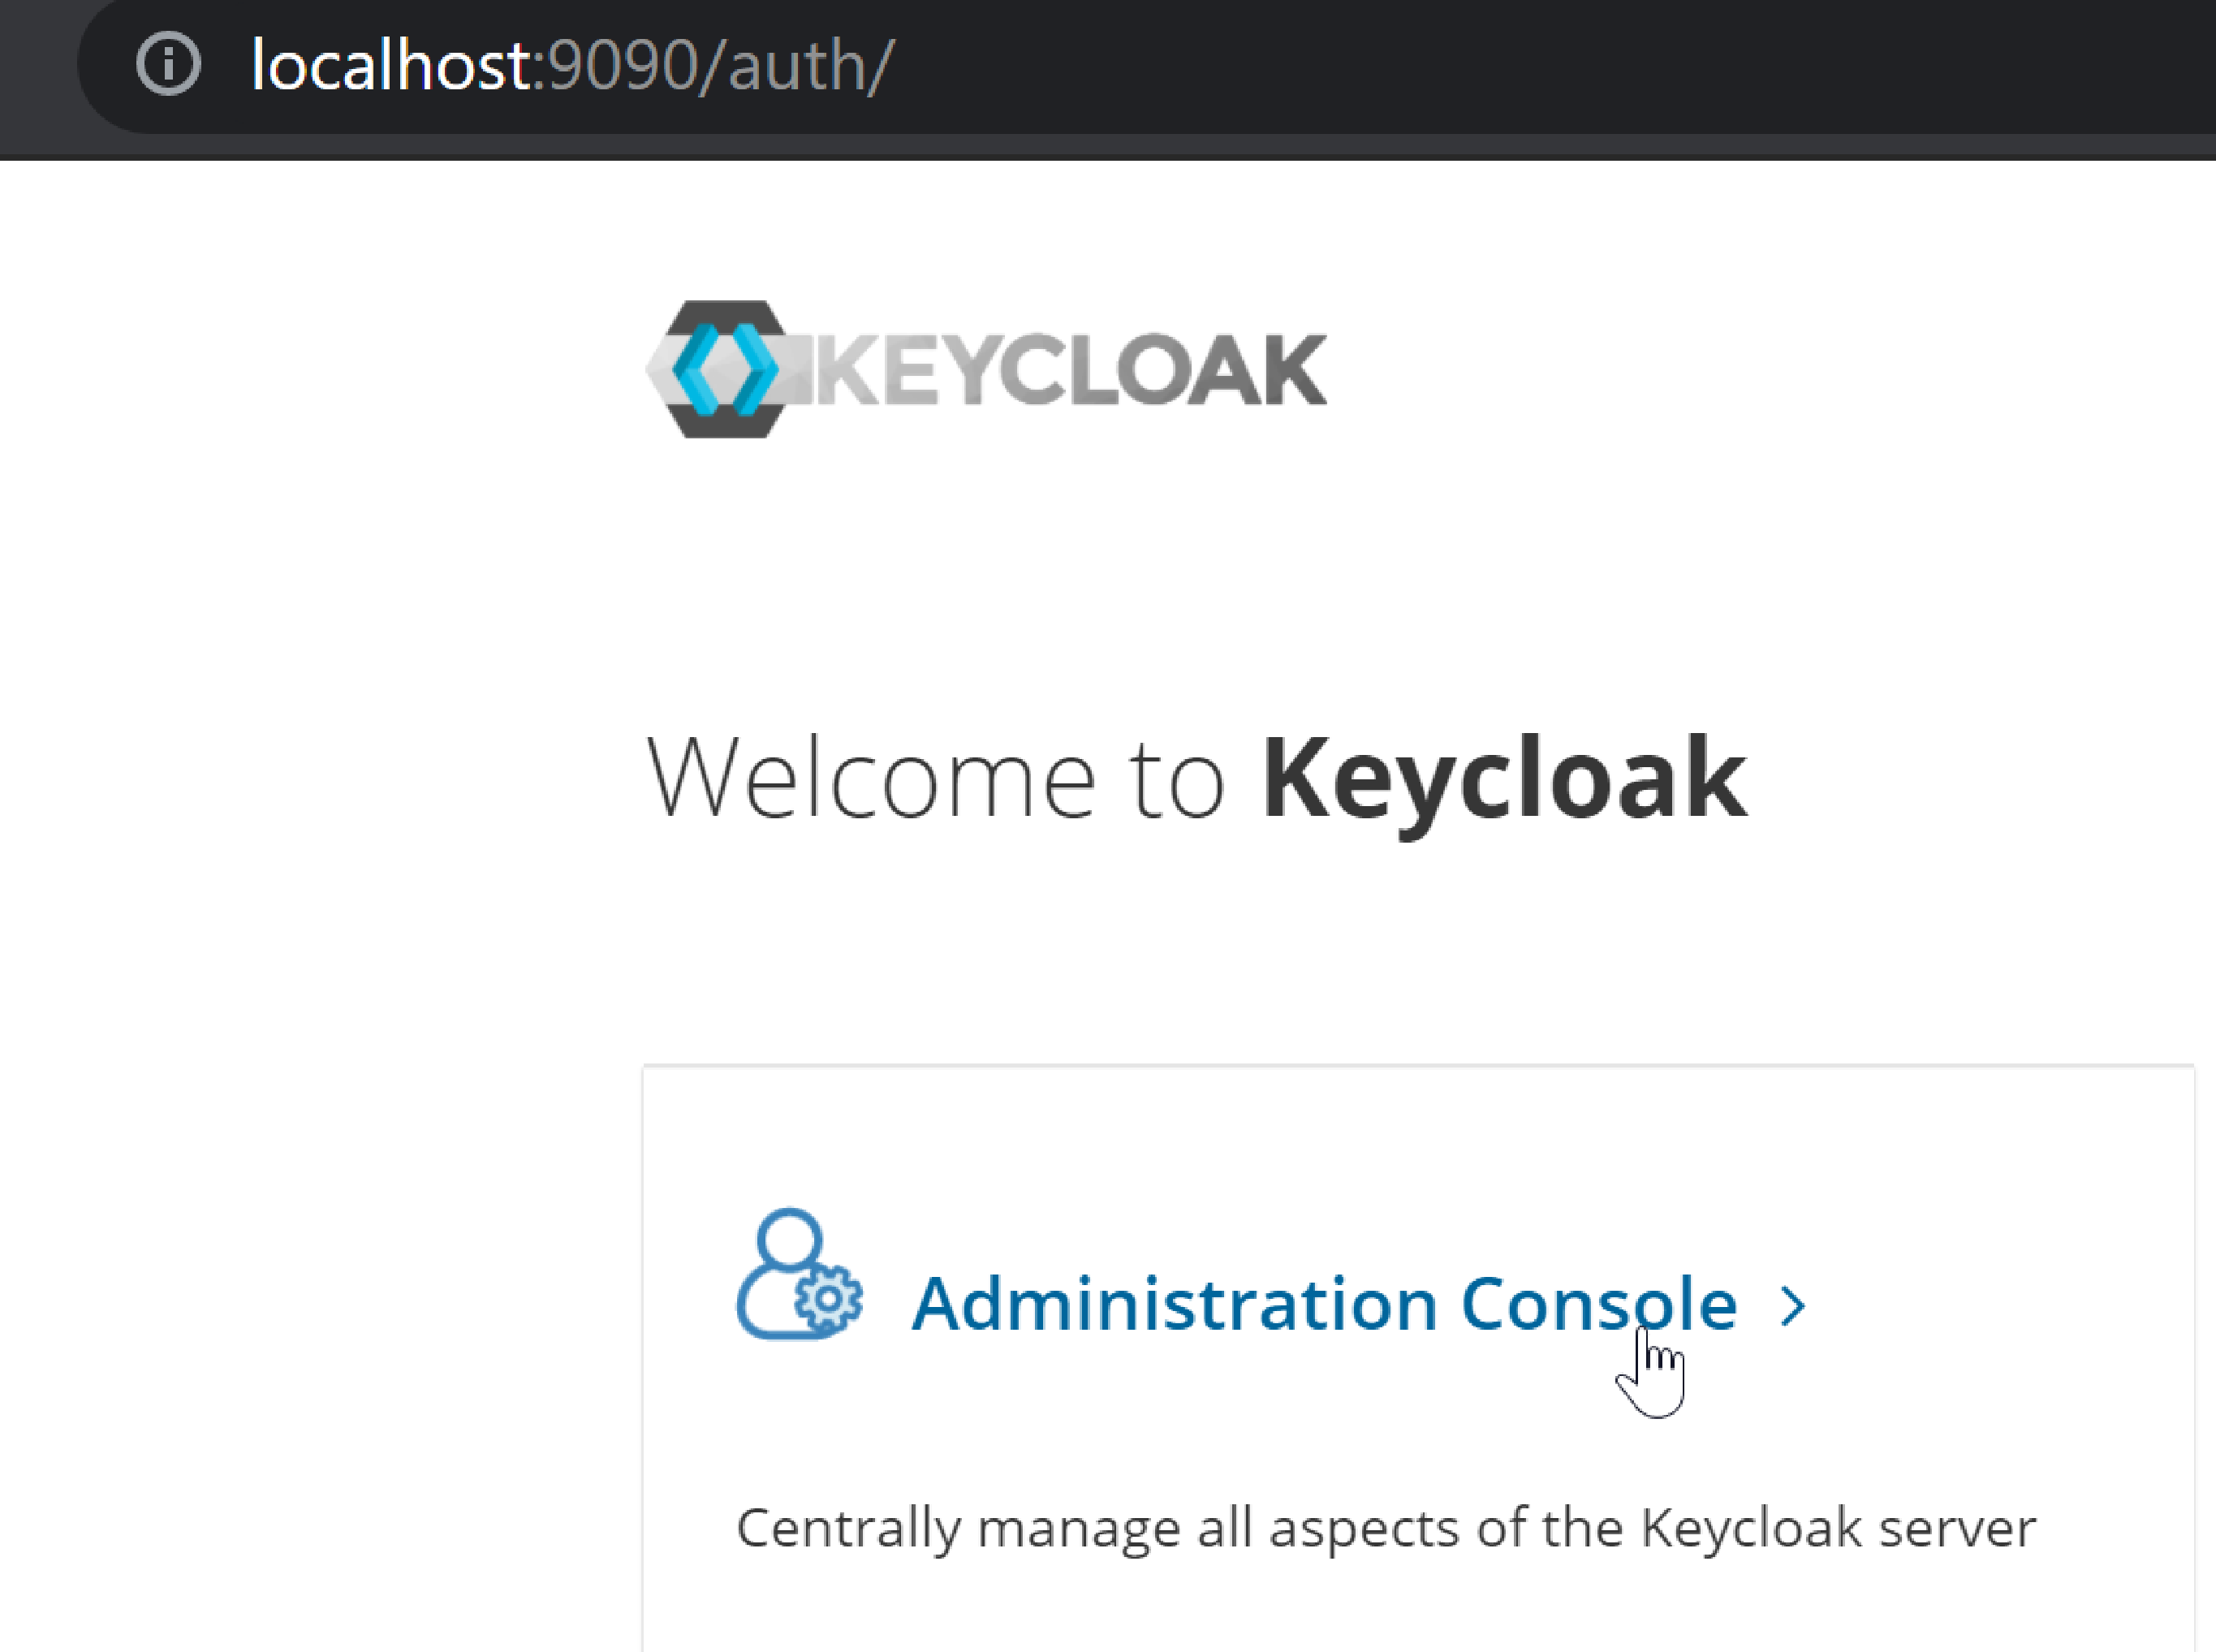
and
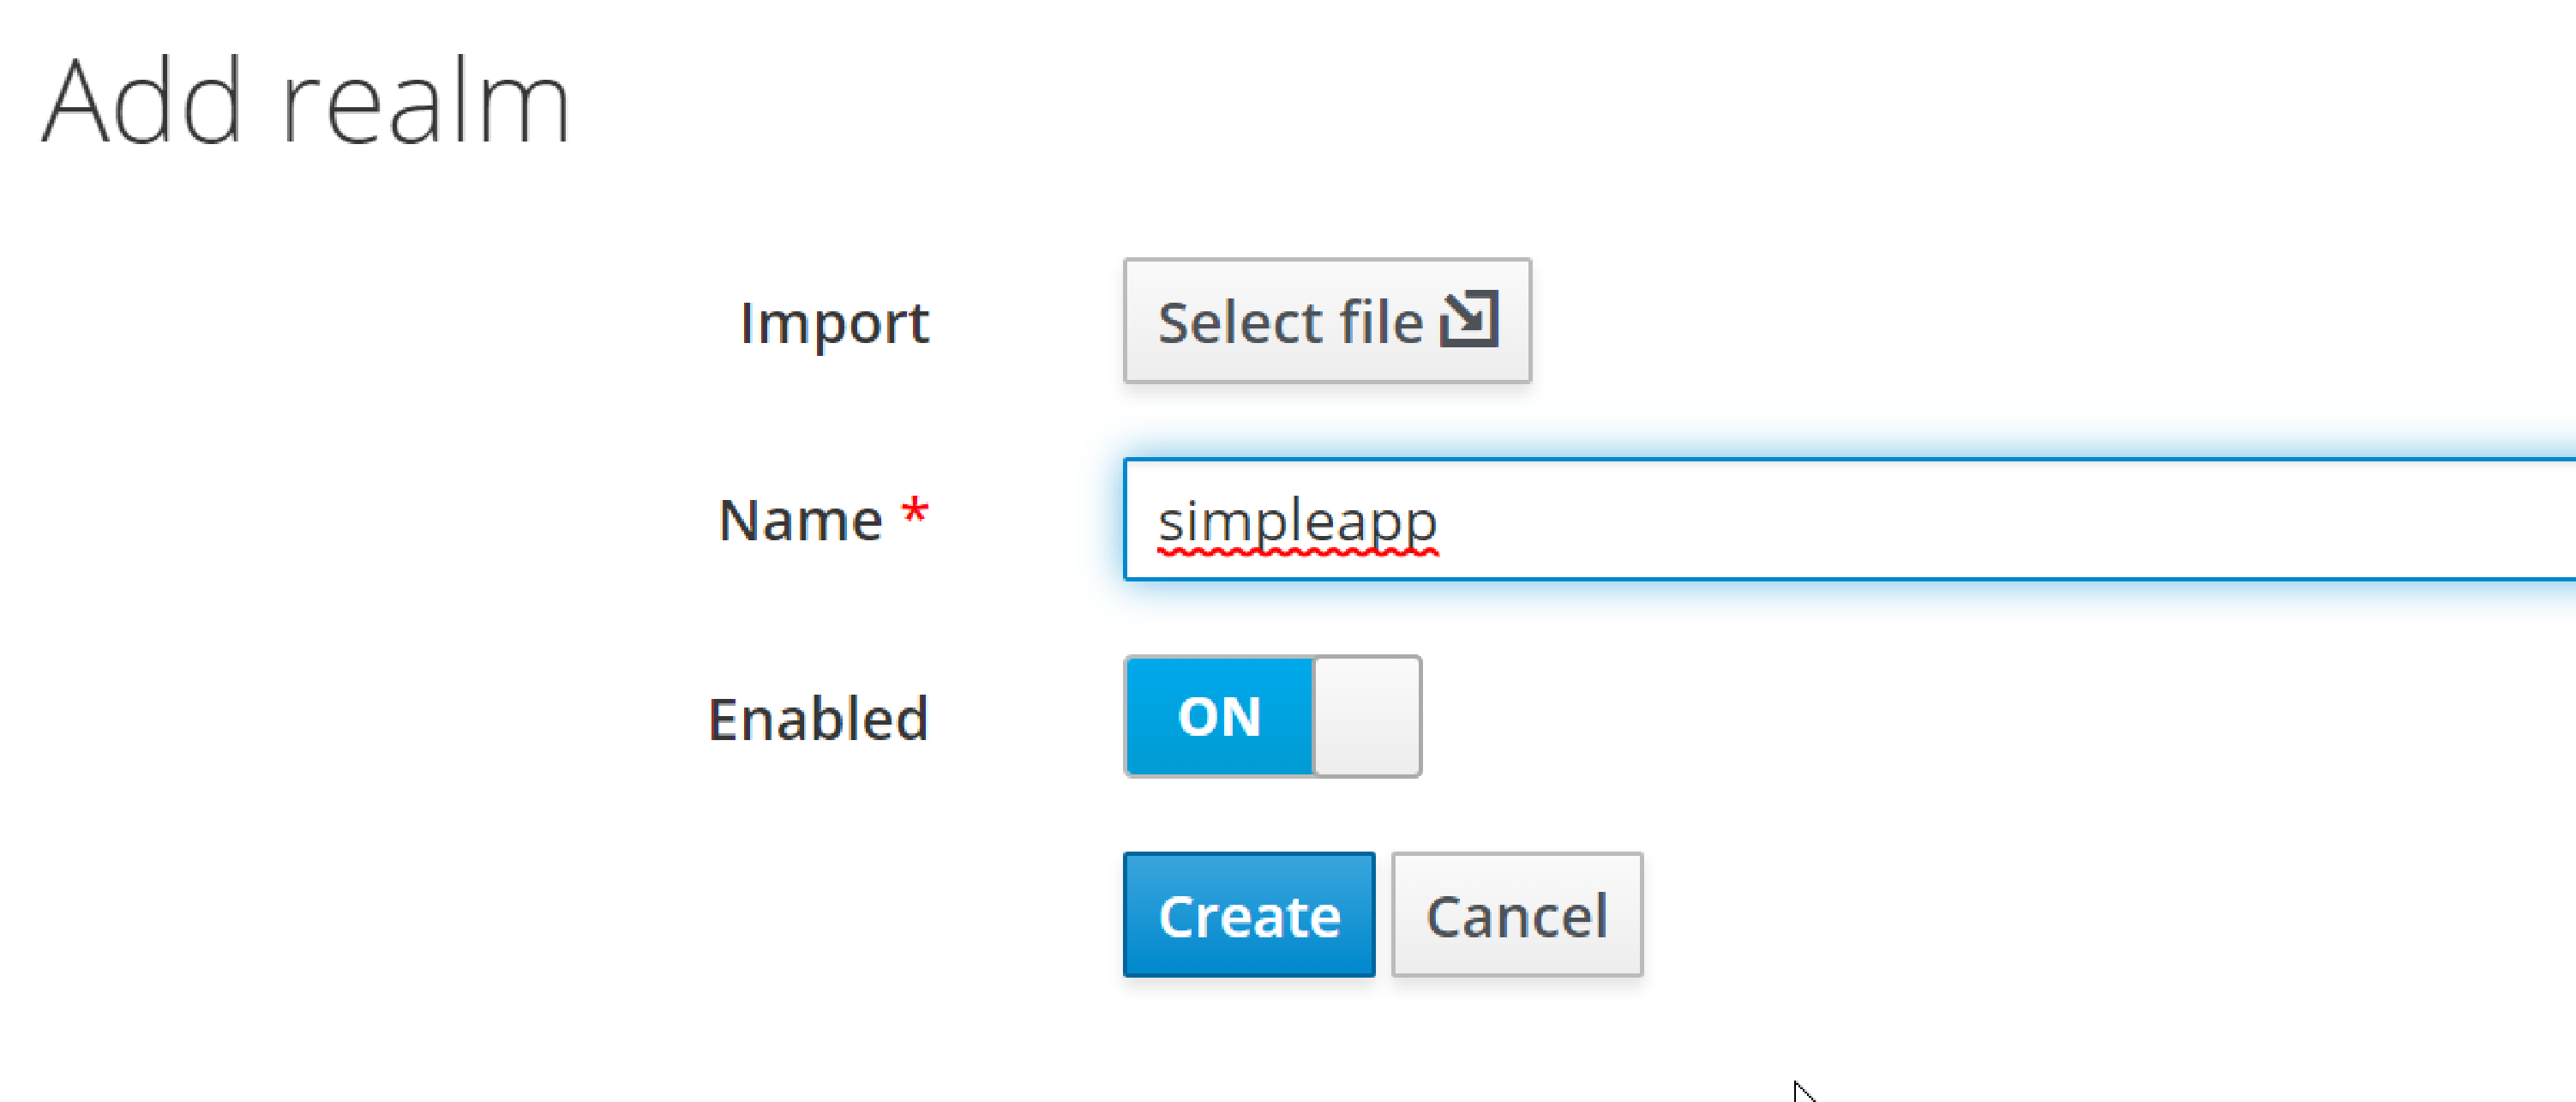
Create a realm for simpleapp
It’s good practice to use a separate realm for each application:
-
create a realm:
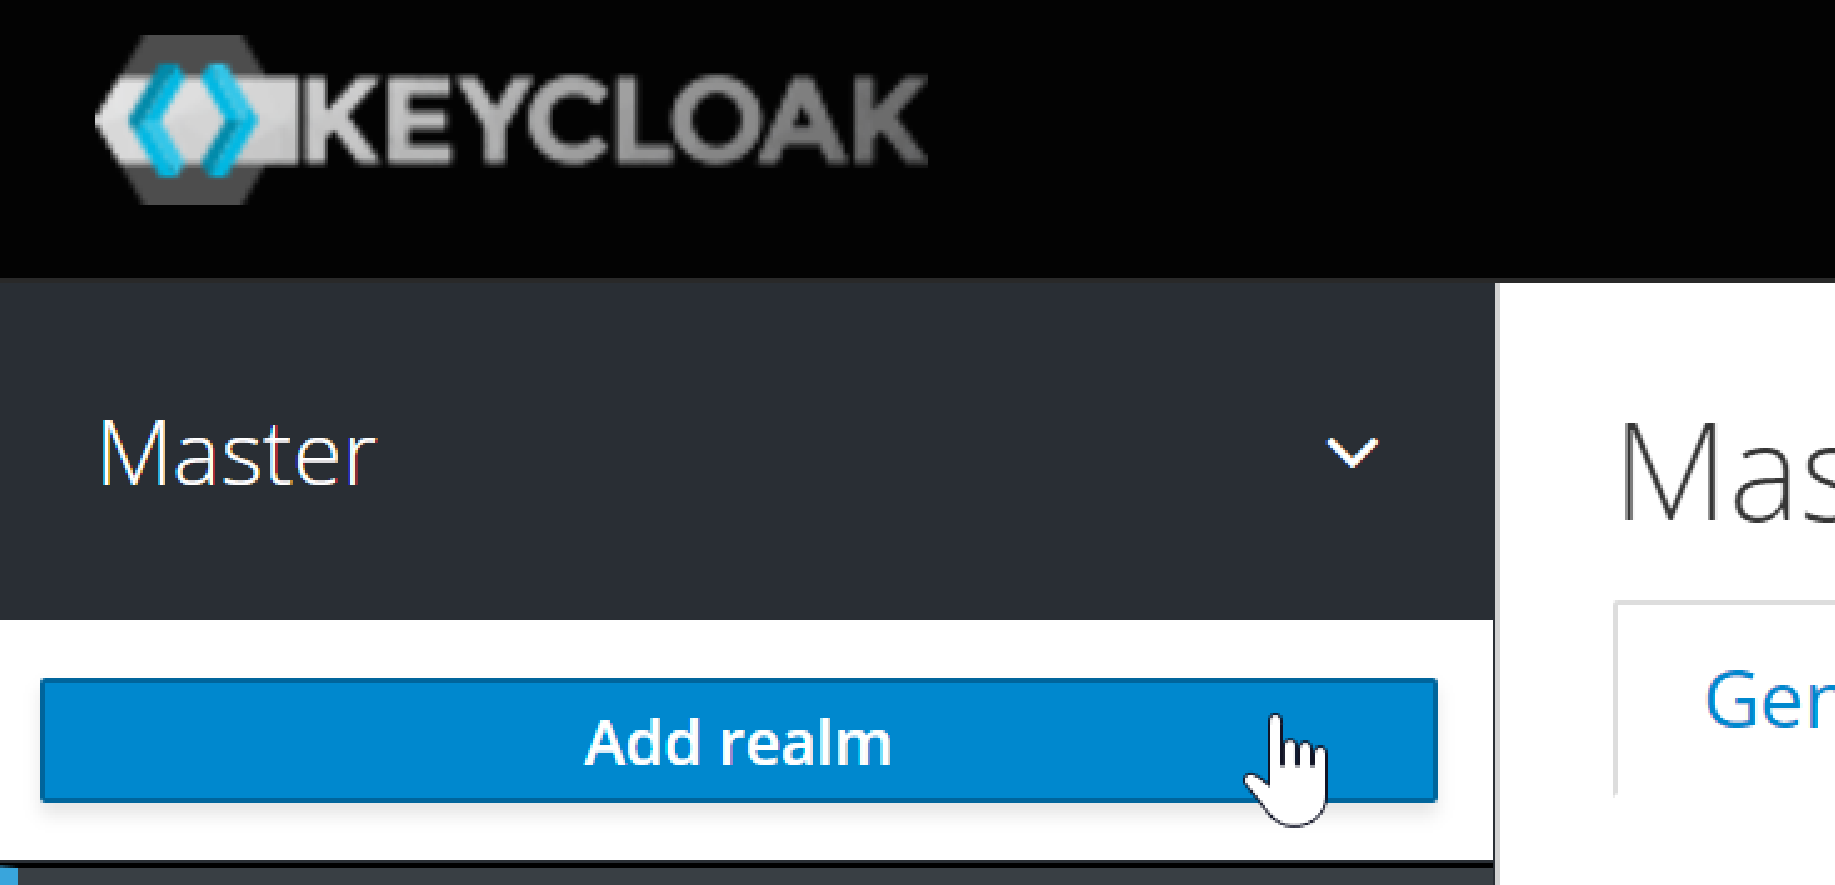
and:
Create a Keycloak client for the application
From the perspective of Keycloak, the Apache Causeway domain application is a client: the domain app redirects its login page to Keycloak (and be redirected back on success). We therefore need to create the Keycloak client for our app:
-
create the client:
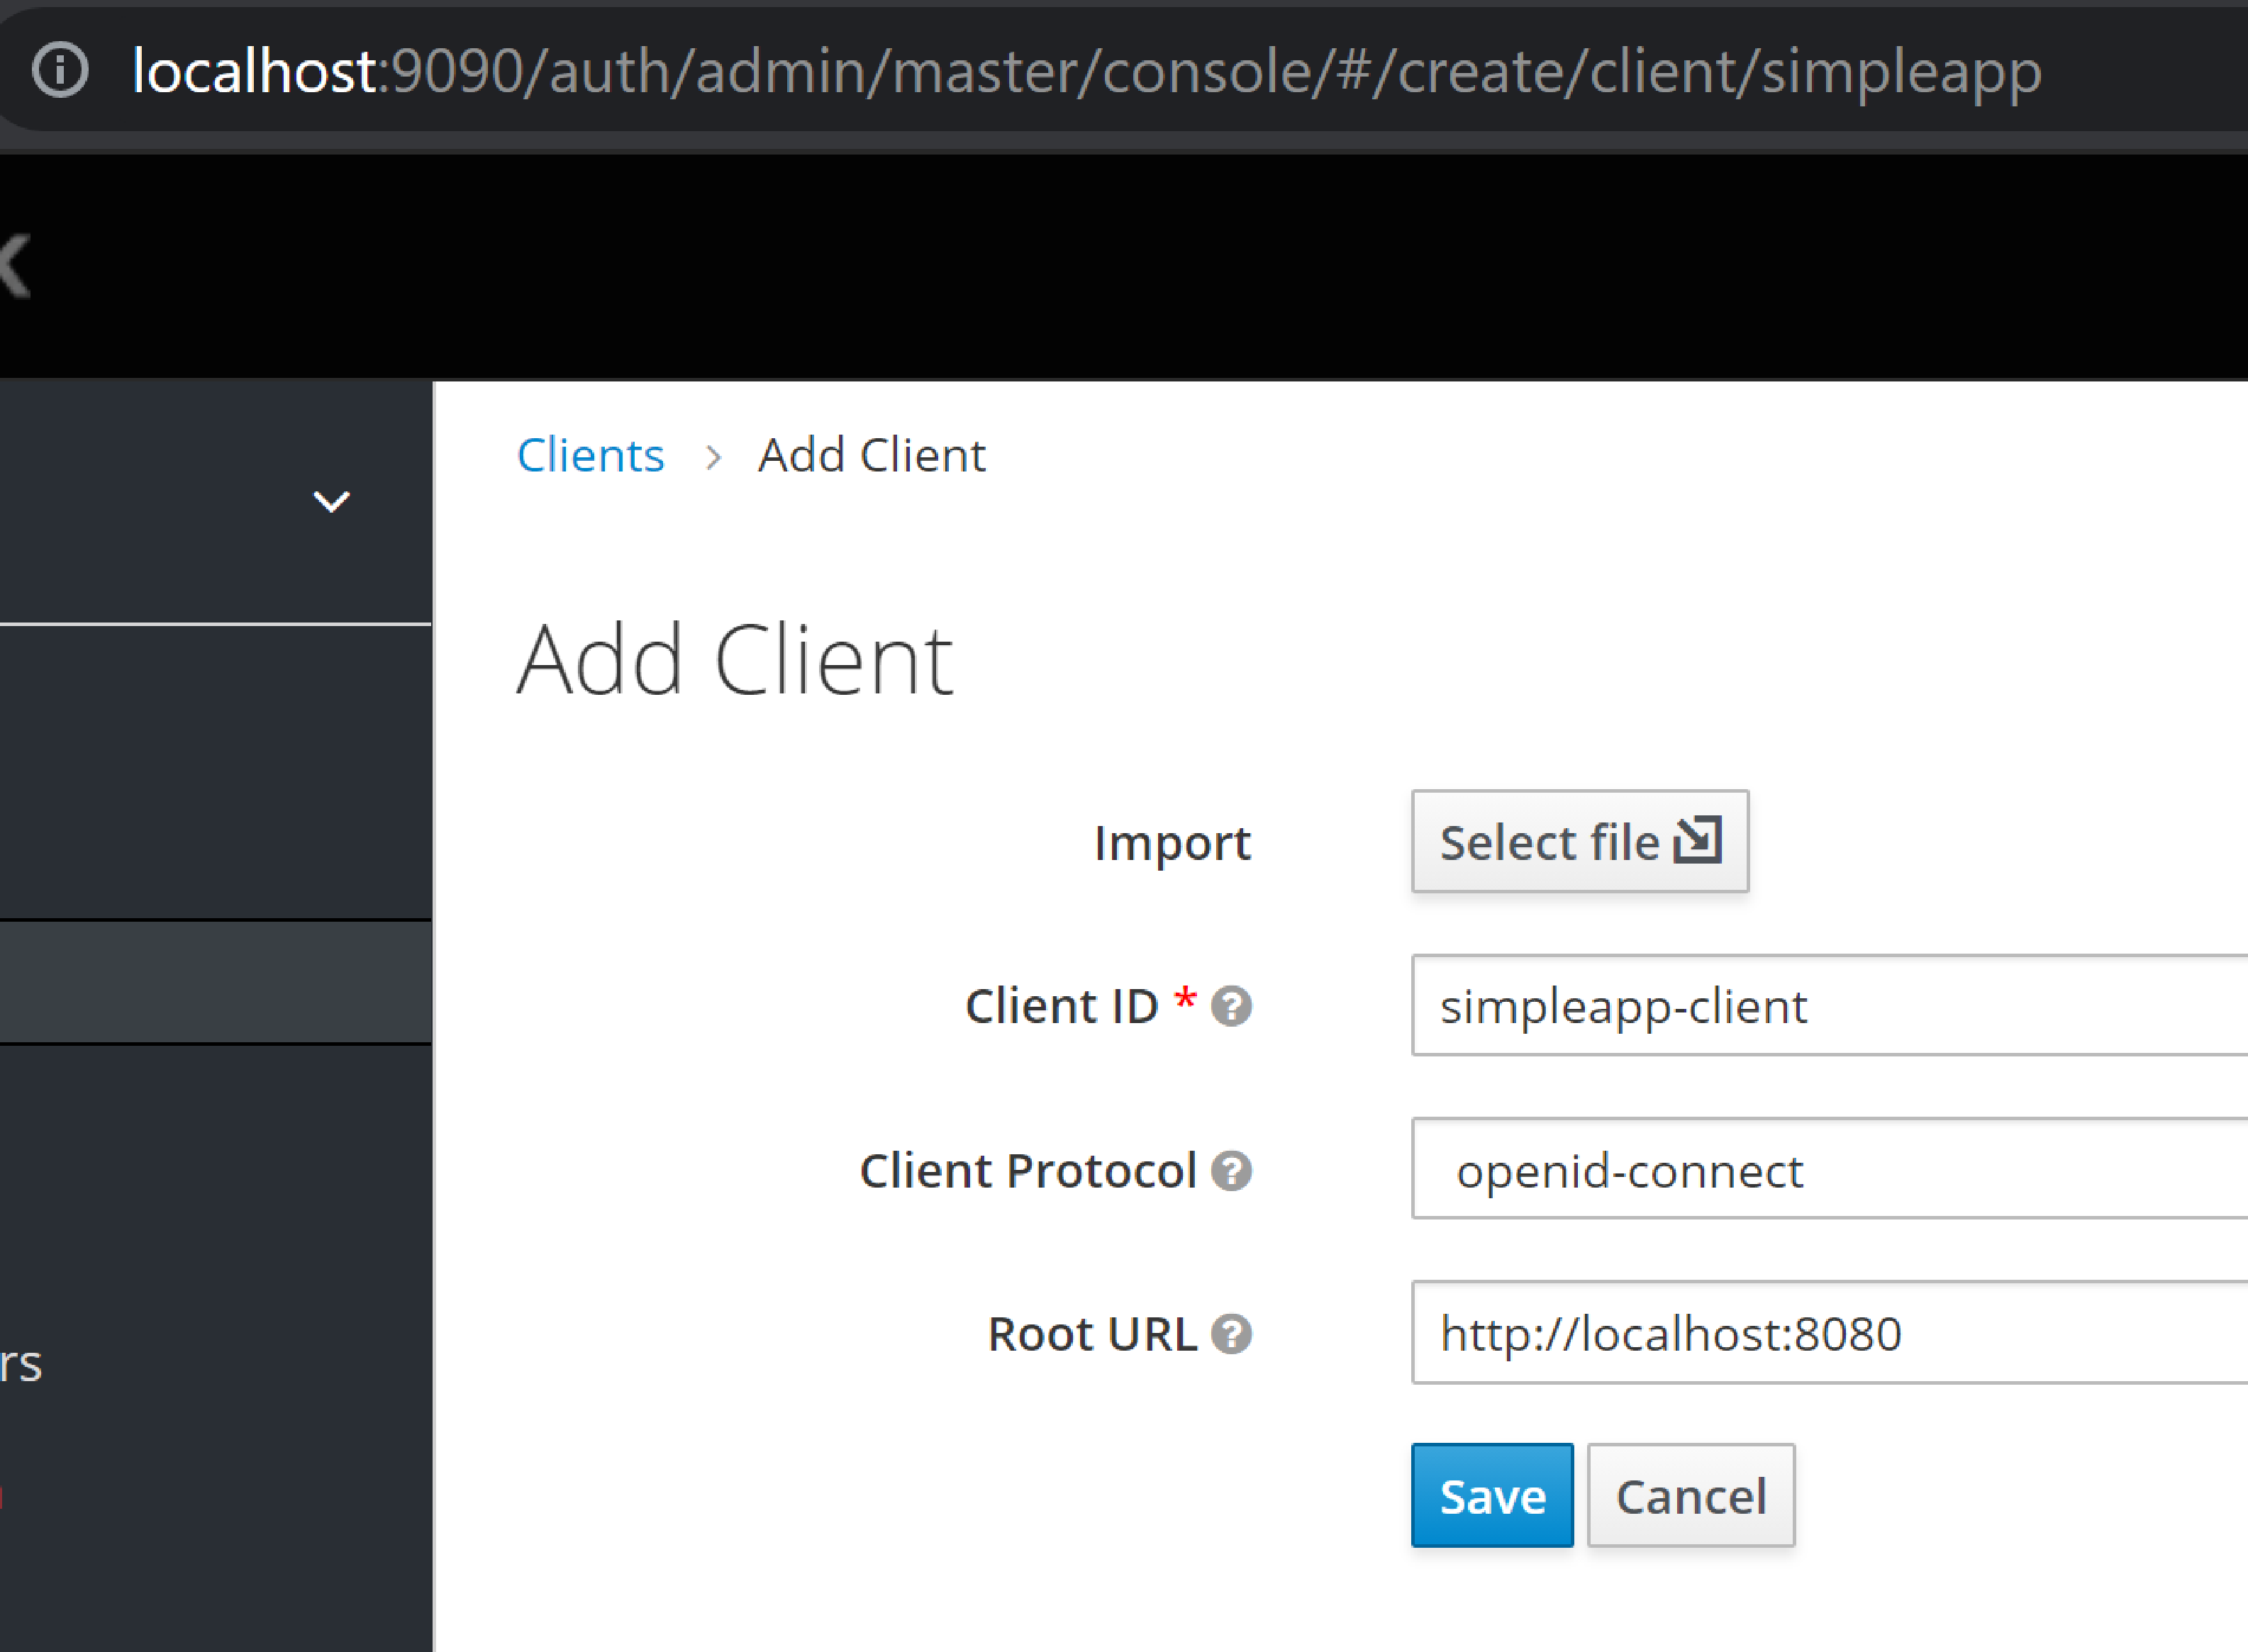
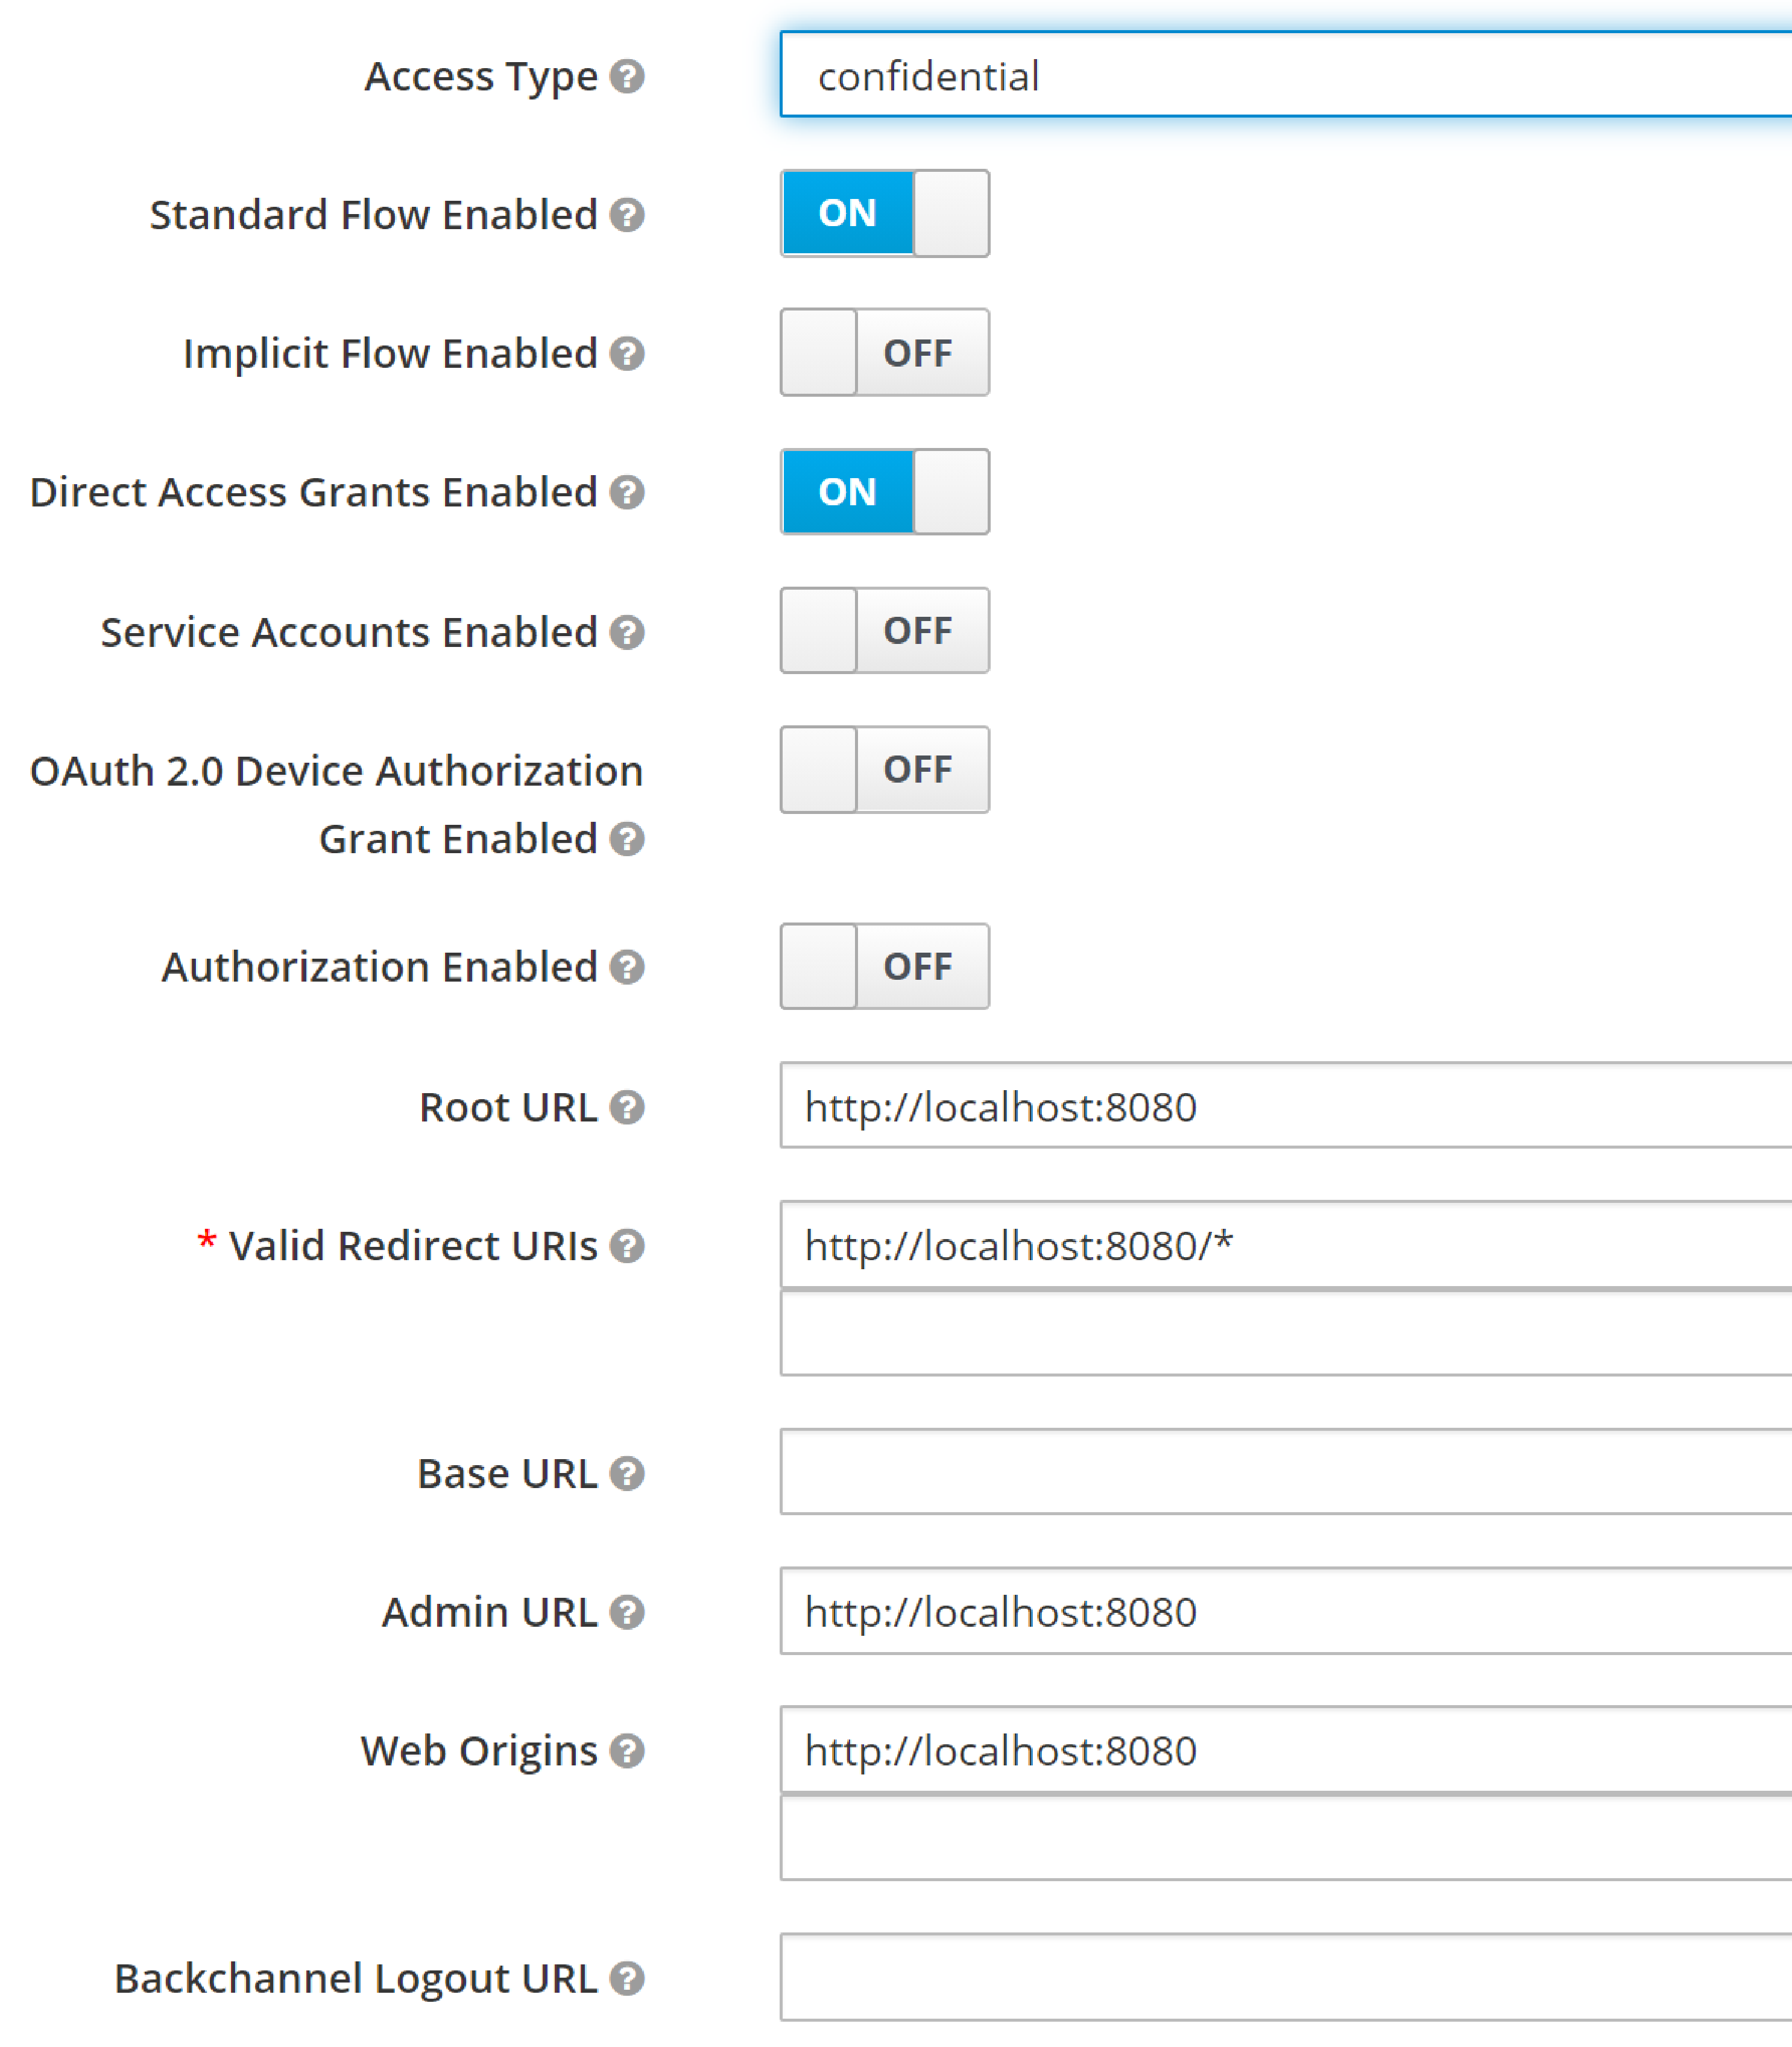
-
specify Access Type = confidential, and Valid Redirect URI for the client:
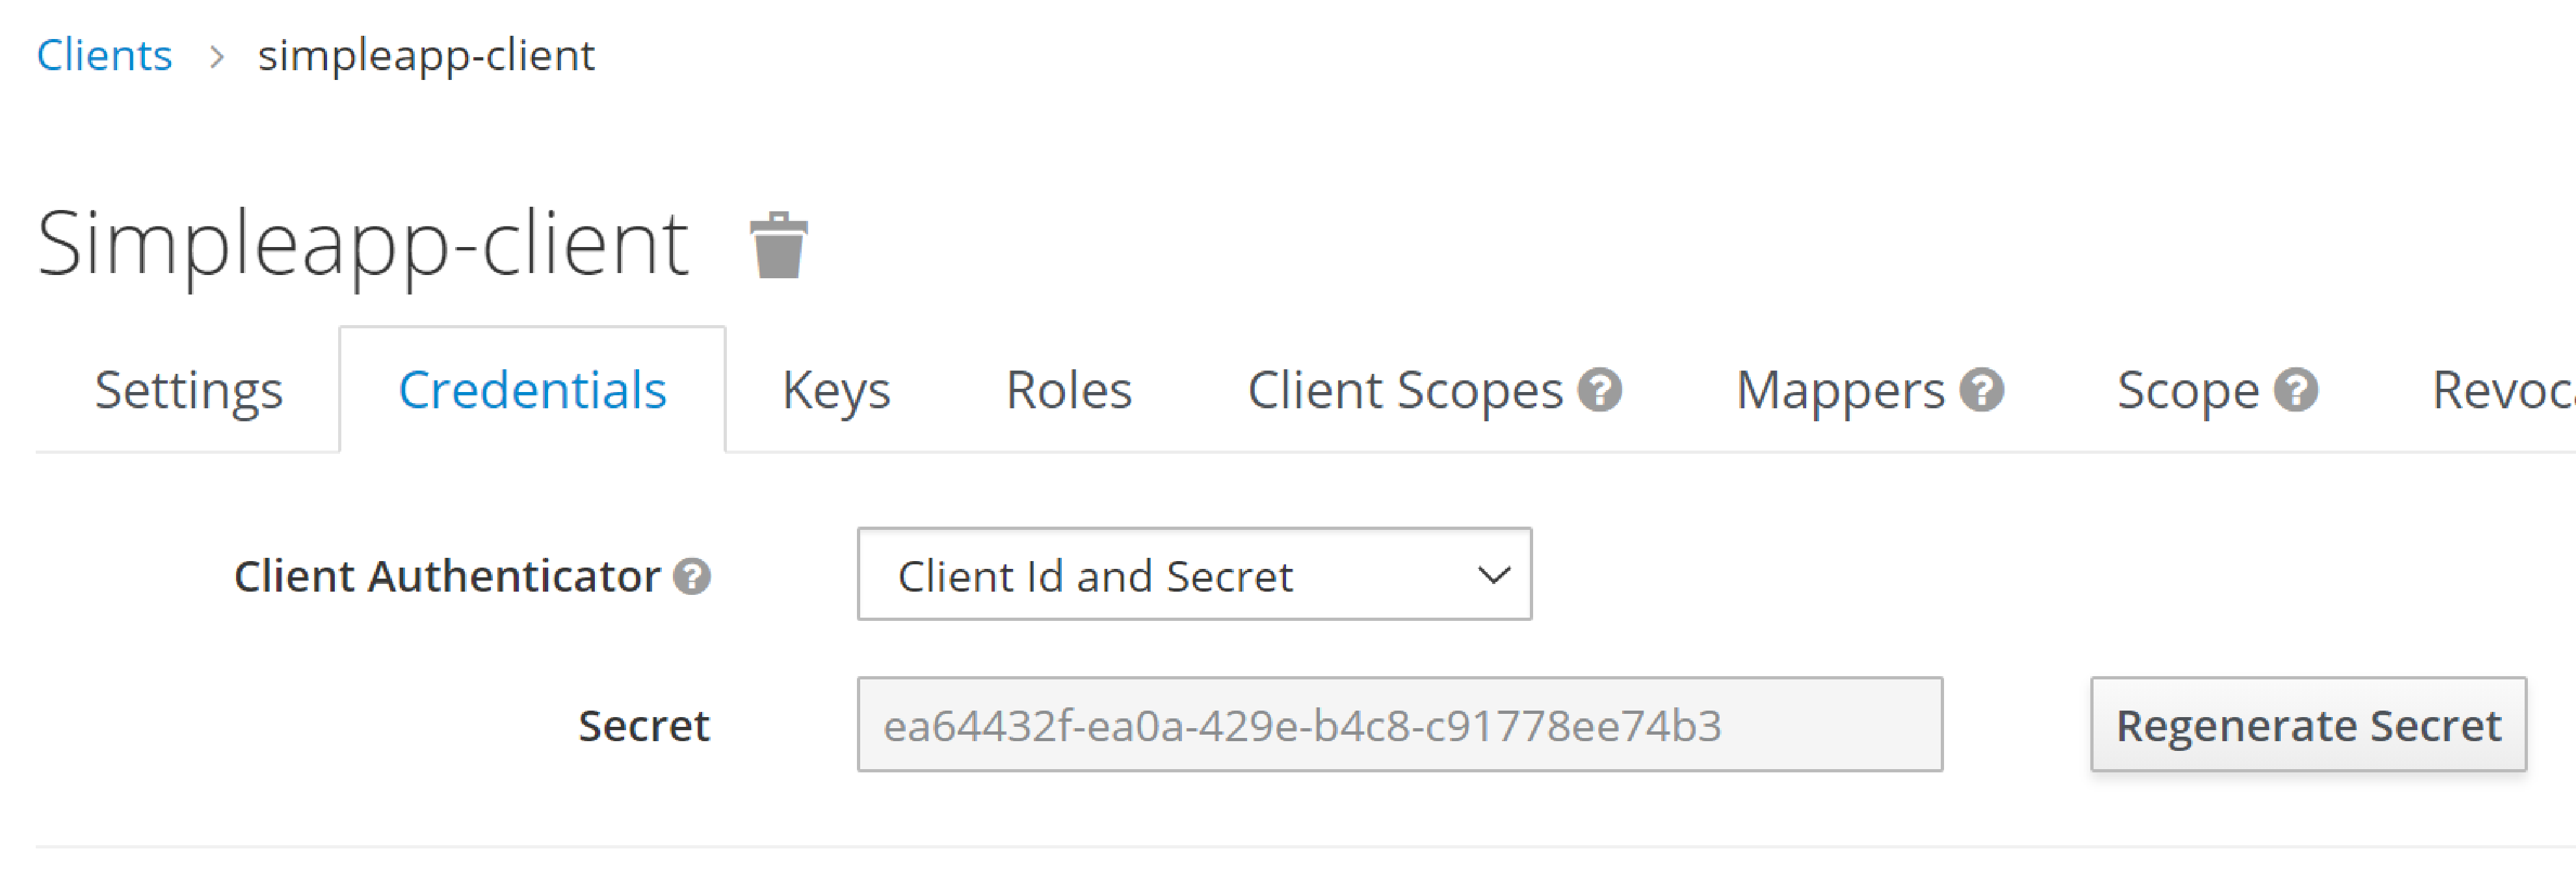
-
copy the secret from the "credentials" tab:
Configure the application as a Keycloak client
-
the keycloak config:
config/application.propertiescauseway.security.keycloak.realm=simpleapp (1) causeway.security.keycloak.base-url=http://localhost:9090/auth (2) kc.realm-url=${causeway.security.keycloak.base-url}/realms/${causeway.security.keycloak.realm} (3) spring.security.oauth2.client.registration.simpleapp.client-id=simpleapp-client (4) spring.security.oauth2.client.registration.simpleapp.client-name=Simple App spring.security.oauth2.client.registration.simpleapp.client-secret=a04b1b32-3e8a-4803-b7ec-70bfb7e8ec2b (5) spring.security.oauth2.client.registration.simpleapp.provider=keycloak (6) spring.security.oauth2.client.registration.simpleapp.authorization-grant-type=authorization_code spring.security.oauth2.client.registration.simpleapp.scope=openid, profile spring.security.oauth2.client.registration.simpleapp.redirect-uri={baseUrl}/login/oauth2/code/{registrationId} spring.security.oauth2.client.provider.keycloak.authorization-uri=${kc.realm-url}/protocol/openid-connect/auth spring.security.oauth2.client.provider.keycloak.jwk-set-uri=${kc.realm-url}/protocol/openid-connect/certs spring.security.oauth2.client.provider.keycloak.token-uri=${kc.realm-url}/protocol/openid-connect/token spring.security.oauth2.client.provider.keycloak.user-name-attribute=preferred_username
| 1 | as defined in keycloak.
The registration properties below must specify this property as the registration key. |
| 2 | URL where keycloak is running |
| 3 | application-defined property, just to reduce the boilerplate below |
| 4 | must match the client name entered in the admin console. |
| 5 | as taken from the credential tab of the realm |
| 6 | remaining property values are boilerplate and should not need to change. |
Make sure that with the key prefix spring.security.oauth2.client.registration.xxx, the "xxx" is the name of the realm being registered to Spring Security.
|
Check the account
-
check that the account is setup by navigating to http://localhost:9090/auth/realms/simpleapp/account/:
sign-in:
-
should be logged in ok:
Test
Finally, start the Apache Causeway application:
-
and confirm that navigating to http://localhost:8080 redirects to the keycloak login:
-
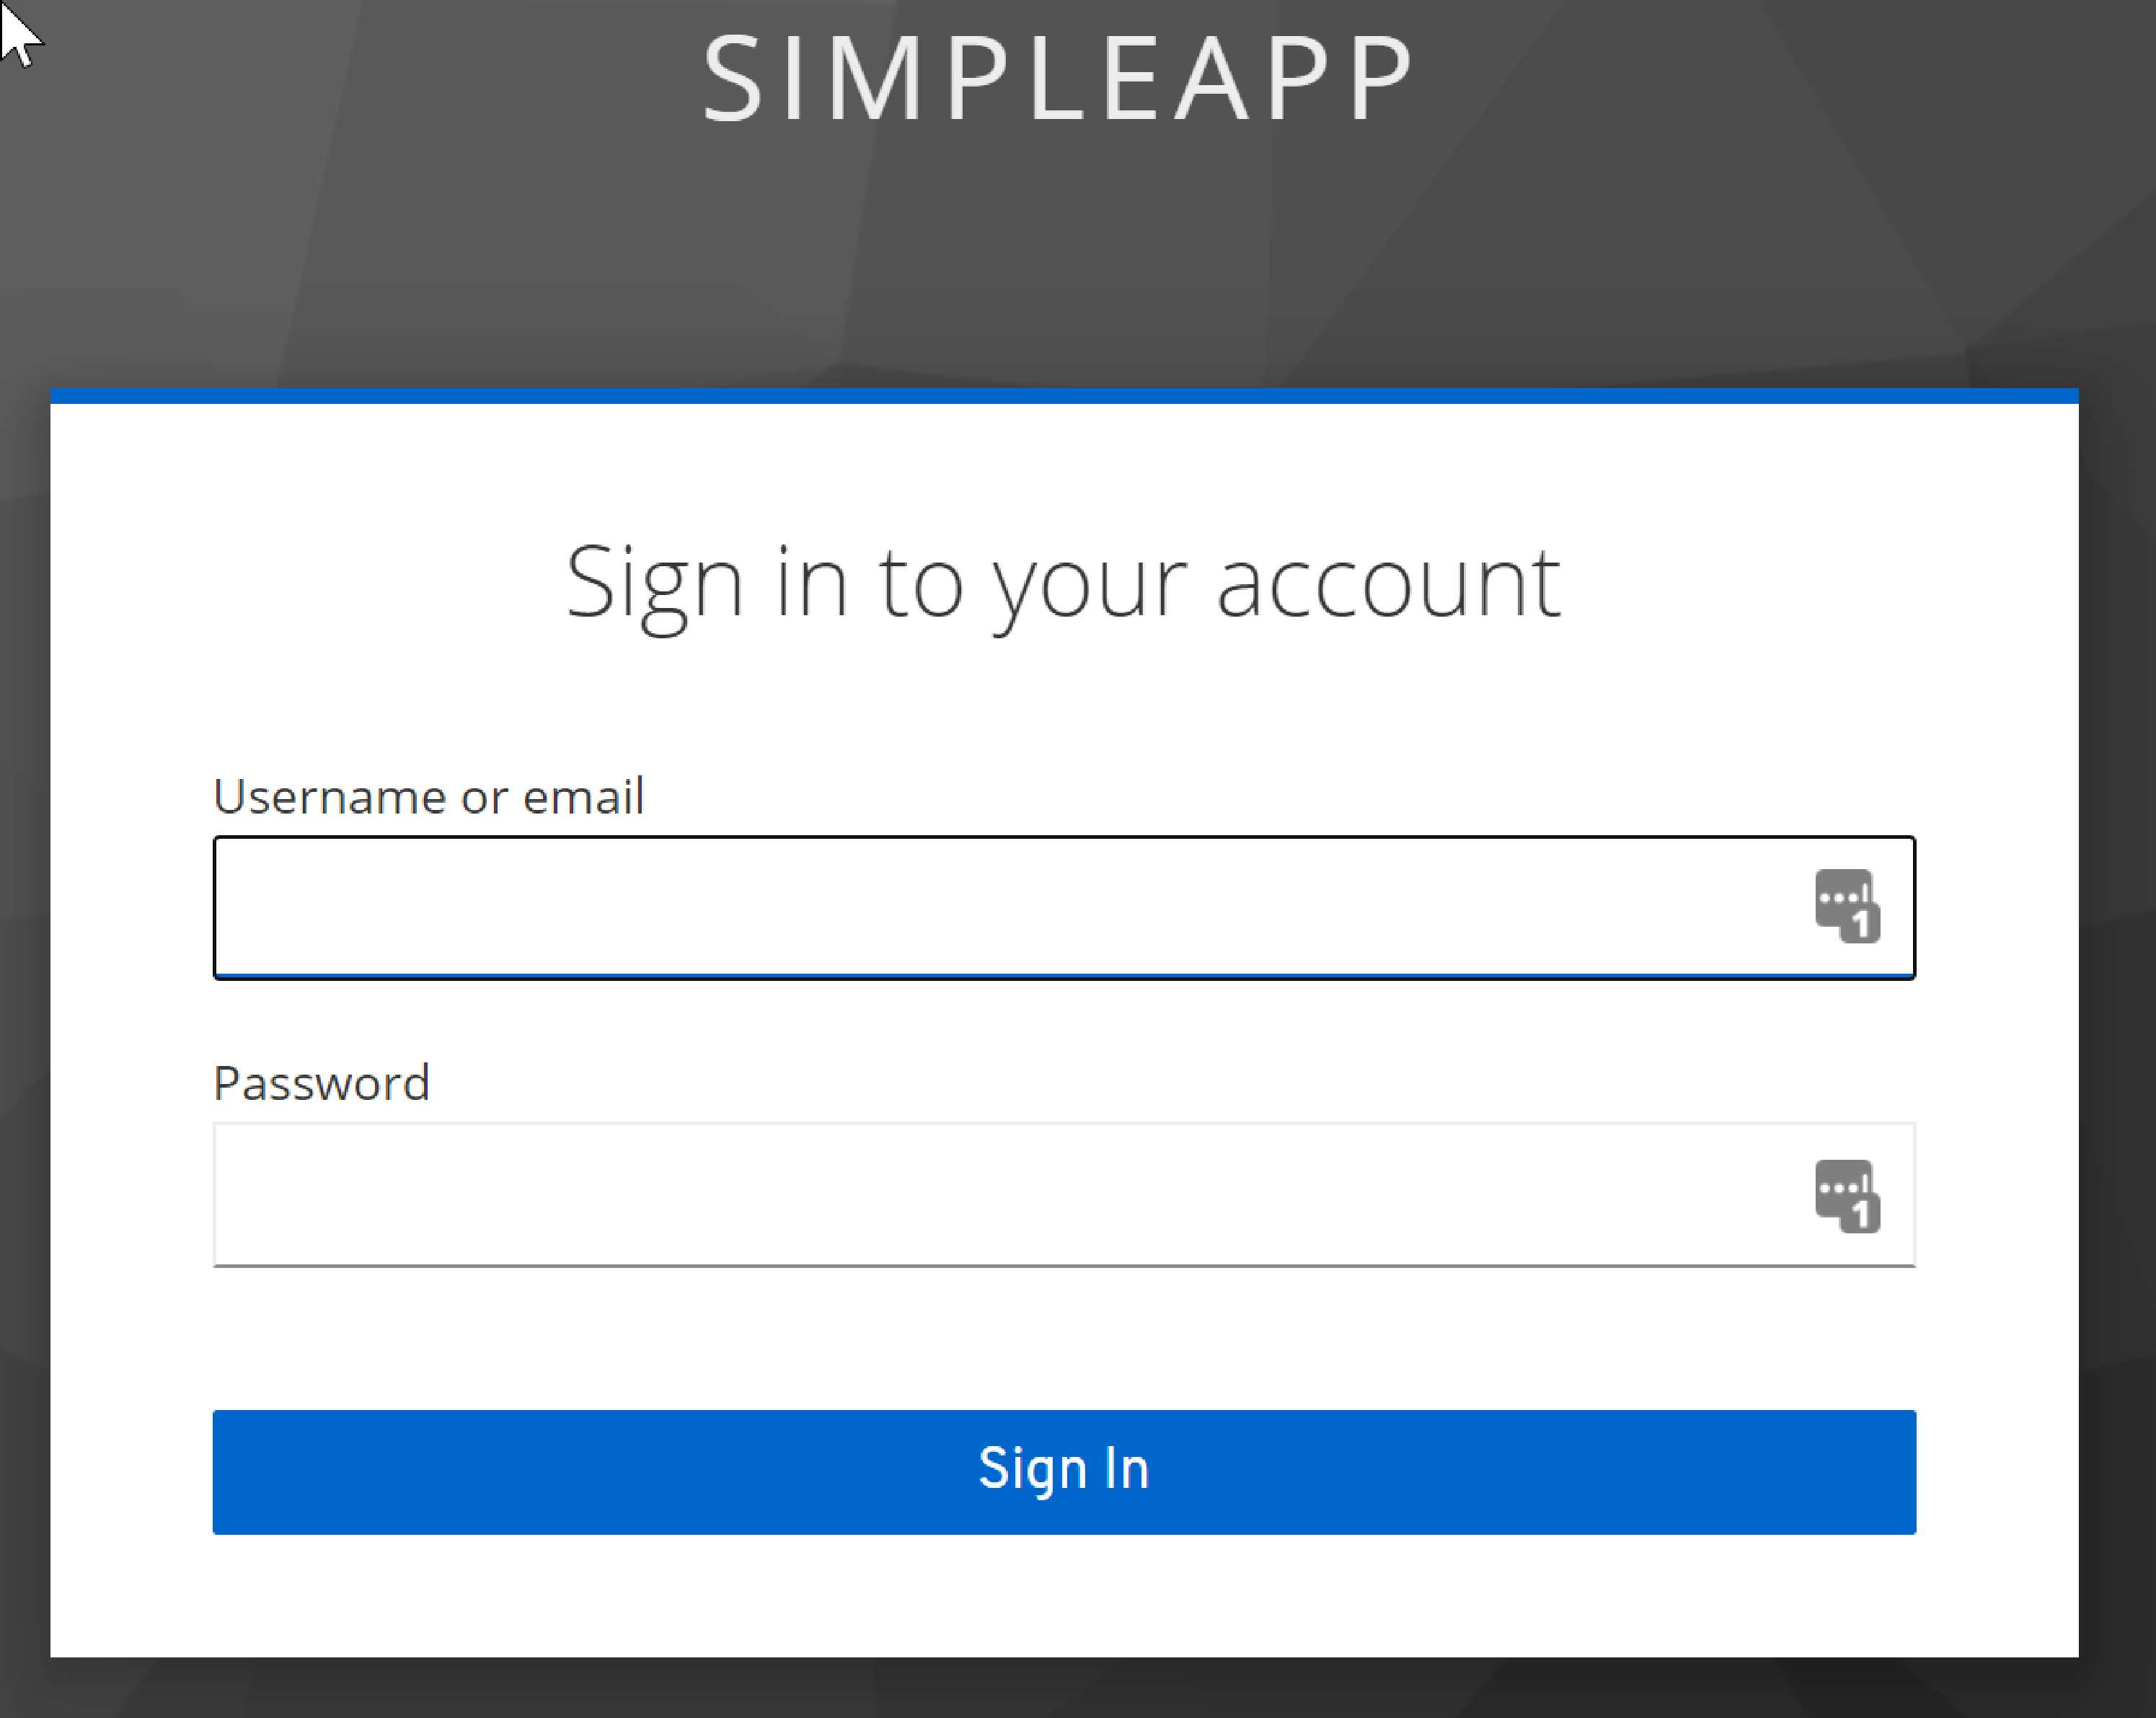
you should be able to log into the app:
-
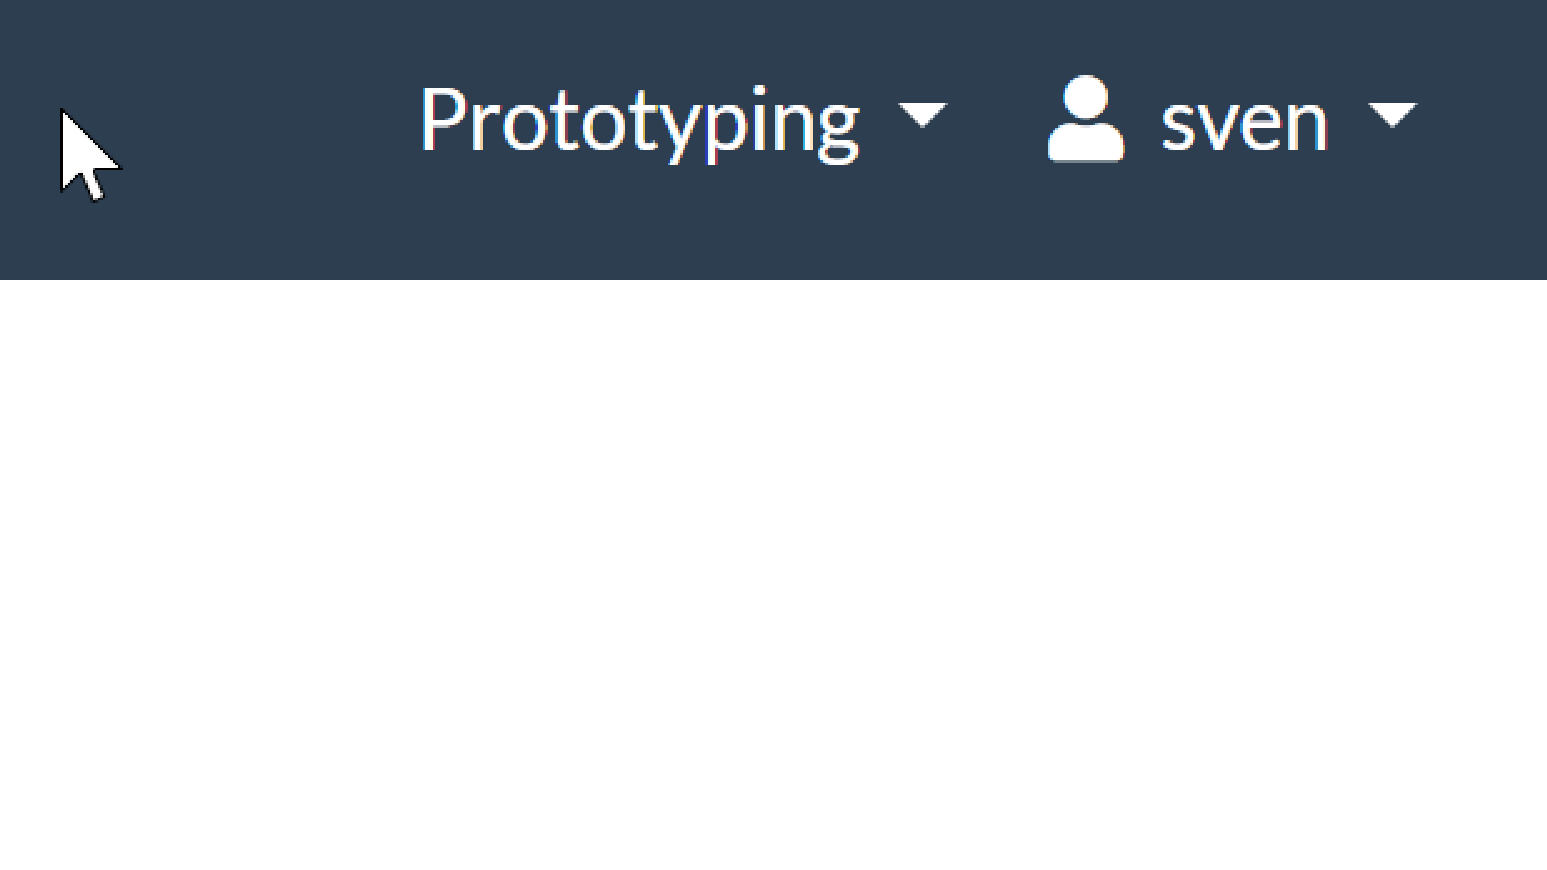
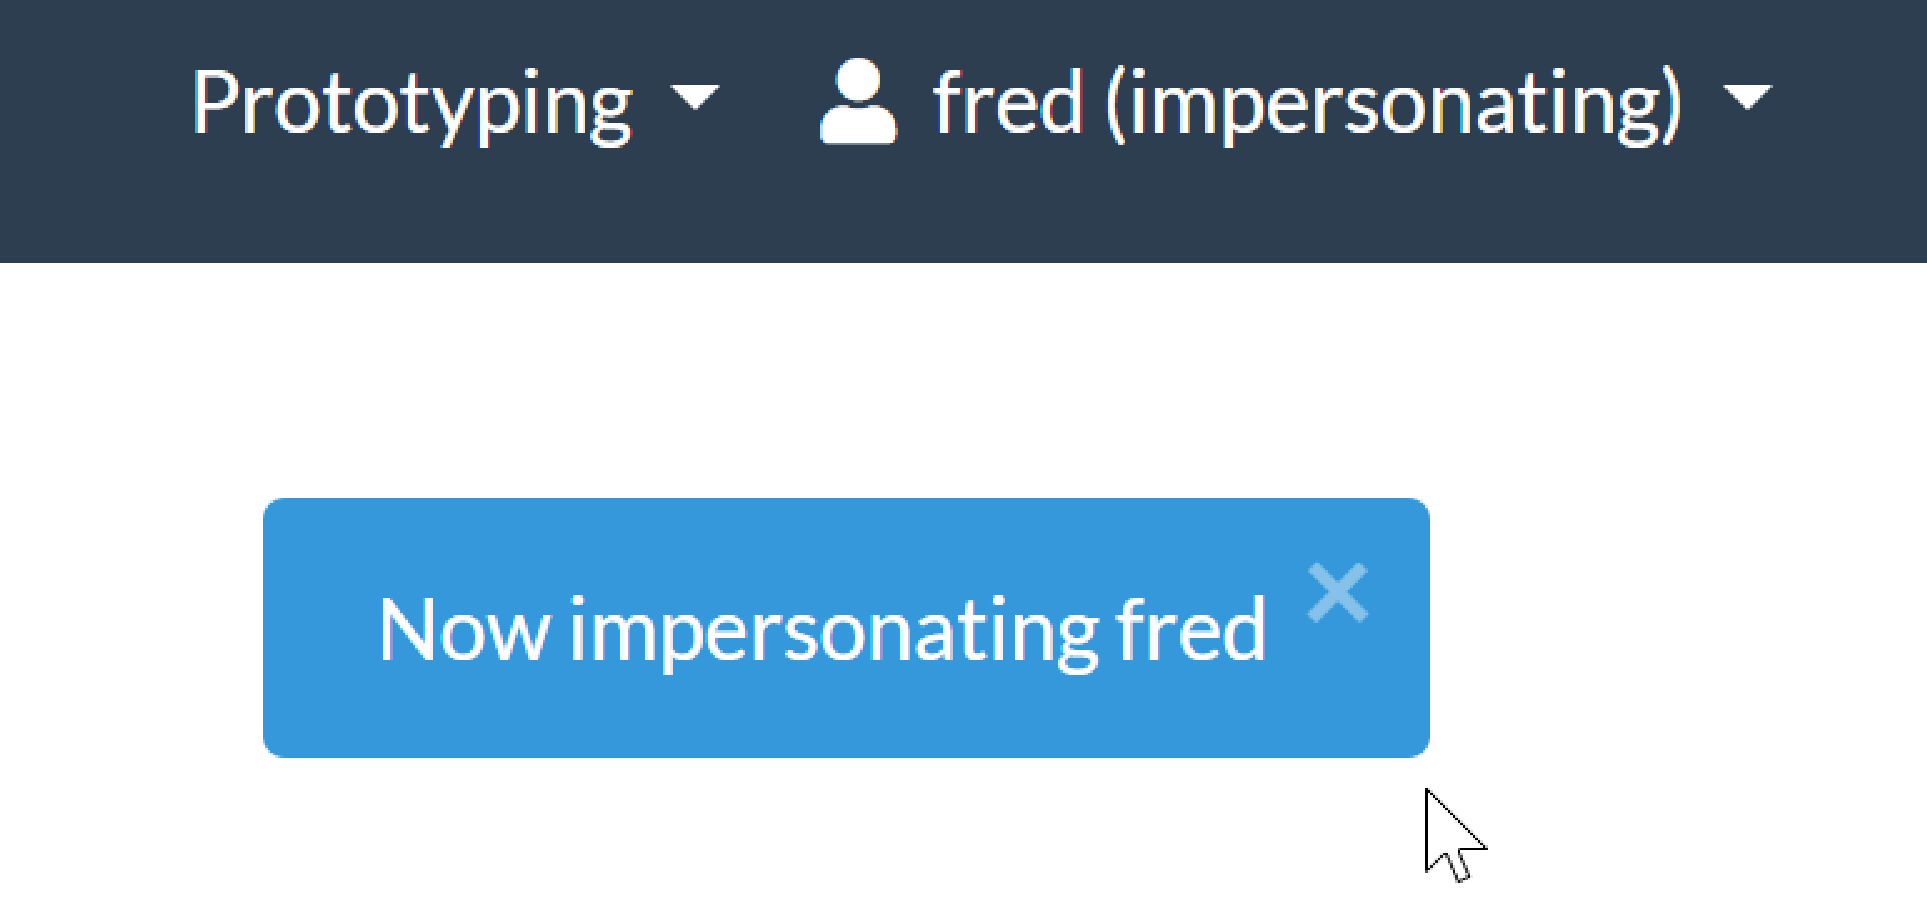
if running in prototype mode, you should still be able to impersonate other users:
-
Logout should of course take you back to the login page.